To begin with get all your tools together first. Here’s a list of what you’ll need:
Screwdrivers - Standard and Phillips #2
¼ inch open end wrench or small adjustable wrench
5/16 inch open end wrench
Needle nose pliers, preferably angled tips
Drill motor
Drill bits #40 and #28 or very close equivalents
Flat mill bastard file
Vice
Felt tipped marker
Masking tape
Vacuum cleaner
A good friend ;-)
We are going to do this with the playfield in the machine and a minimum of parts removal. Get the glass off and set it somewhere safe - please ;-) and remove the balls as well.
The left protector is notched and needs to be bent to match the curve of the ramp. Do this with your thumbs and try to make it as smooth a bend as possible. I will try to find a way to pre-bend these and package them so they stay bent in the future but for now its up to you.
Place both pieces on the ramp over the damaged area and line them up so they look even. Hold them one at a time up against the ramp and mark your mounting holes. Do the same for both sides. Now remove the pieces and use the #40 drill on the RIGHT side as this piece will be held with the sheet metal screws. Use the #28 drill on the curved LEFT side as this piece mounts with the 6-32 screws and locknuts. Be very careful not to push too hard when drilling as you may crack the ramp or worse. Watch the sides of the cabinet so that the drill chuck doesn’t grind into it. Now vacuum the plastic shavings and install the pieces using the fasteners provided. Admire your first repair!
This gets a bit more involved but it’s still very straightforward. Refer to the pictures for clarification if necessary. You will need to loosen the STEPS ramp to complete this section.
Start by removing the 2 locknuts holding the mirror and remove the mirror itself. Unplug the connector in back to remove it and set aside so it doesn’t get damaged.
Lift the playfield and support it against the backbox.
Unplug the connectors for the wireform habitrail switches (green and white wires)
Lower the playfield.
Remove the screws holding the STEPS ramp. Loosen the STEPS wireform habitrail. This requires removing the screws at the diverter split. Be very careful here as the ramp plastic is thin. Remove the locknuts holding the habitrail at the STEPS ramp end.
Carefully lift the habitrail at the STEPS ramp end, pulling the switch wires up as you go. Pull the habitrail from under the diverter split and pull the switch wires only as far as needed to set the habitrail on top of the other habitrail. Tape the two together with masking tape so they are secure being very careful not to let it touch the playfield.
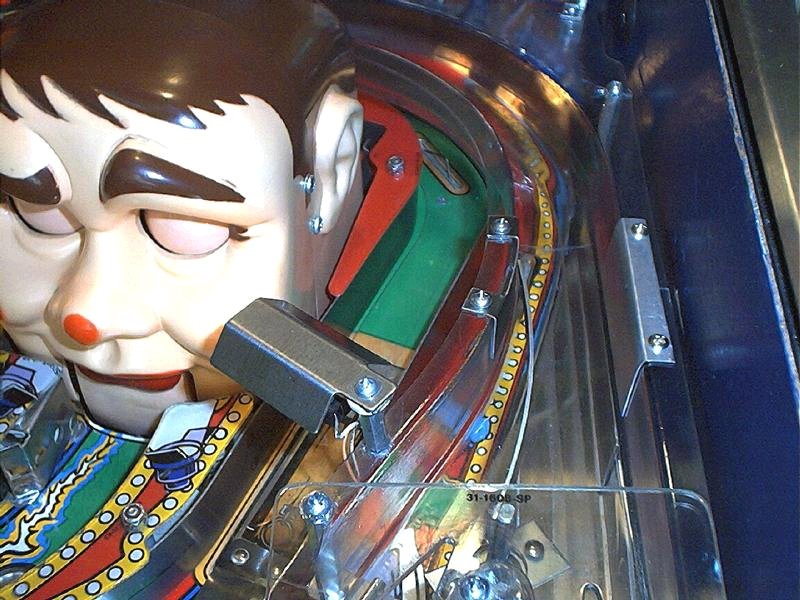
Remove any remaining fasteners holding the STEPS ramp and lift it just enough to allow access to the left side entrance to the main ramp.
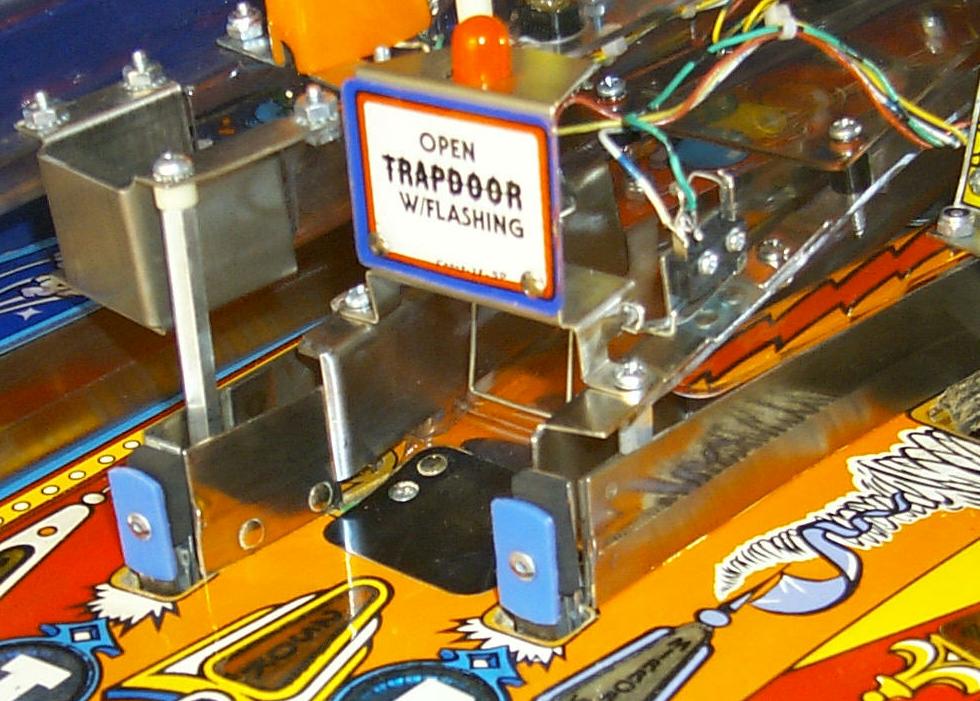
Remove the ”Open Trapdoor When Flashing” gate making a note of the microswitch lever for re-installation later.
Remove the counter sunk flathead screws holding the ramp entrance flap.
You should see a hole through the playfield just behind the support bracket for the “E” target. This is where we will install one of the included ¼ inch hex aluminum posts.
This is where your friend comes in handy. You’ll need to tilt up the playfield enough to install the post screw but not so much as to make the STEPS ramp crash out the back. Have your friend hold both the playfield and the ramp so all is secure while you insert the long 6-32 screw with star lock washer through the bottom of the playfield and into the post. No need to tighten yet as you will have to mark it for trimming. I did this myself without help so I know it will be easier with a helping hand.
Lower the playfield and position the center ramp to the side of the post. You may have to squeeze the ramp a tiny bit, don’t worry. Once the ramp is back down where it normally rests take your marker and mark the post for trimming with the file. Lift the playfield again and remove the post and screw. Use the vice and file the post down to the correct level. It shouldn’t be very much at all. File it flat; do not try to angle the top of the post to match the incline of the ramp. Just file flat to the lowest level of your mark.
Once again raise the playfield and insert the screw and post. You may tighten it now or later, I prefer to tighten everything at the very last to allow for movement.
Lower the playfield and now you can slip the protectors onto the ramp. Position the right side protector so that the mounting hole is lined up over the newly installed post. Hold firmly and mark the ramp for the mounting holes. Do the same on the other side with your friend holding the STEPS ramp up and out of the way.
Use the #28 drill bit to make your mounting holes. Vacuum up the debris.
Now slide the protectors into place but only fasten with screws and nuts at the top (back) end. Place the ”Open Trapdoor When Flashing” gate with the microswitch lever on top of the swing cradle and use the screw to fasten the right side to the post. Use a screw and locknut to fasten the left side, again with your friend holding the ramp out of the way. You may have to use the needle nose pliers to hold the nut under the lip of the ramp to get it started.
Install the ramp entrance flap screws and do not over tighten them! Just get them down flush or a bit below. Too tight will cause the ball to launch.
Once you are satisfied with the fit you can tighten the fasteners. Don’t forget to tighten the screw beneath the playfield.
Admire your handy work ;-)
Position the STEPS ramp into it proper place but without installing any screws at this point. Just make sure it is correctly positioned over all existing mounting holes.
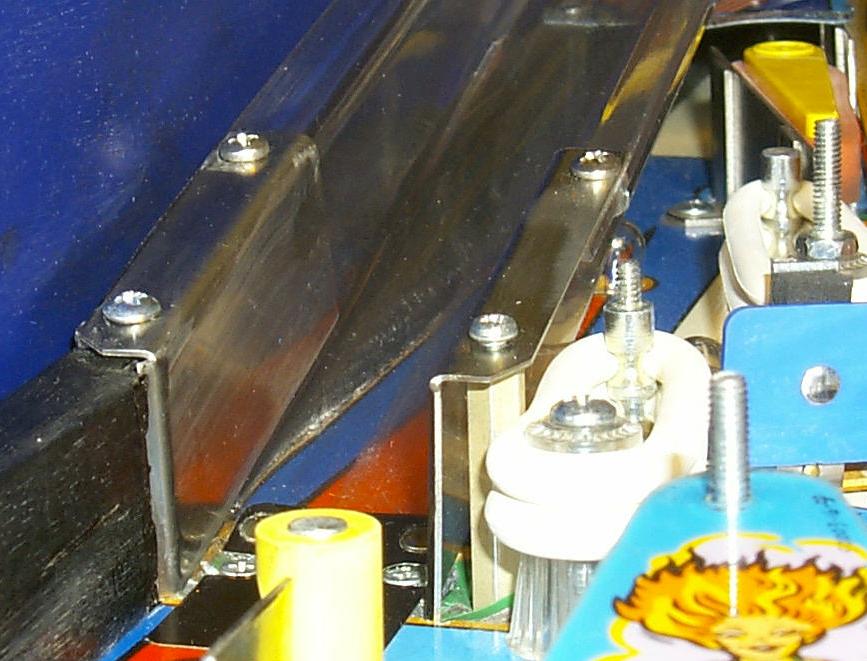
Slide the right side protector into place with the lowest edge resting in the routed cavity where the entrance flap mounts. Refer to the pictures for clarification.
Mark the ramp for the new mounting holes and drill them with the #28 drill bit. Do the same on the left side protector.
Remove the protectors for now.
Using a long pointed object, like a miniature jewelers screwdriver, poke it through the right side front hole, lining it up as vertically as possible, and push it into the green soft pad below. If your pad is missing just go ahead and mark the wood itself. This will be the hole for the other post so get it straight!
Lift the playfield and move any wires that may be directly below where you will be drilling and then lower the playfield again (getting tired yet?)
Have your friend hold the ramp out of the way so you can use your #28 drill to drill through the playfield (Don’t worry! You’re drilling through the routed cavity not the painted surface!) You will probably hit the clear post’s adjustable mounting plate… just drill through it.
Vacuum the debris and wipe your brow ;-)
Lift the playfield and insert the long 6-32 screw and star lock washer and fasten the post.
Lower the playfield and slide the left side protector onto the ramp.
Fasten the left piece with a 6-32 screw and locknut at the top (back) end.
Lower the ramp into position and line up your holes for the right side protector. Fasten with a screw and nut at the top end and a screw into the new post at the bottom end.
Use the #6 sheet metal screw into the side rail to fasten the left protector.
Re-install the remaining screws for the STEPS ramp and tighten securely.
Re-install the habitrail and its wiring. Lift the playfield to re-connect the plugs for the switches.
Install the mirror and you’re done! Vacuum all debris, install 3 balls and replace the top glass.
Step back and admire your work… you deserve a game!
Note no warranty is written or implied. Your results will depend on things beyond my control so I cannot and will not be held responsible for any damage incurred during or after installation.
![]()