
Protector installation guide
Follow along as we install Cliffy's set of protectors on a Stern AC/DC Premium pinball. This guide also applies to the Pro model except for the Bell protector. Click the pics to enlarge!
The Bell Protector |
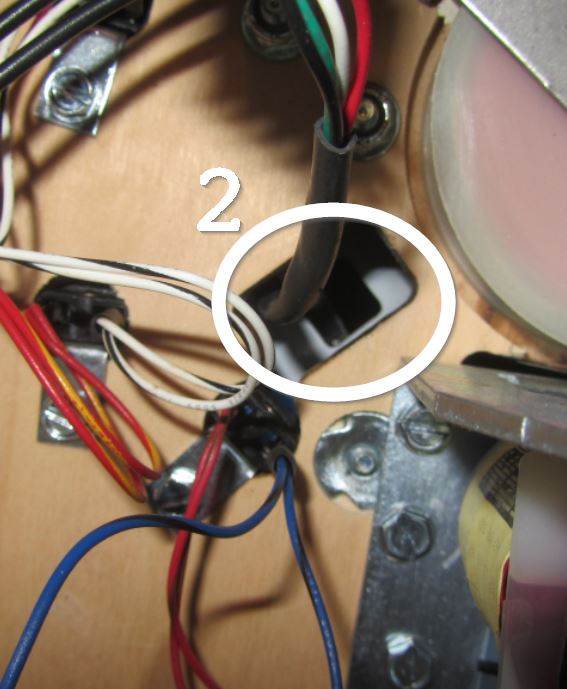
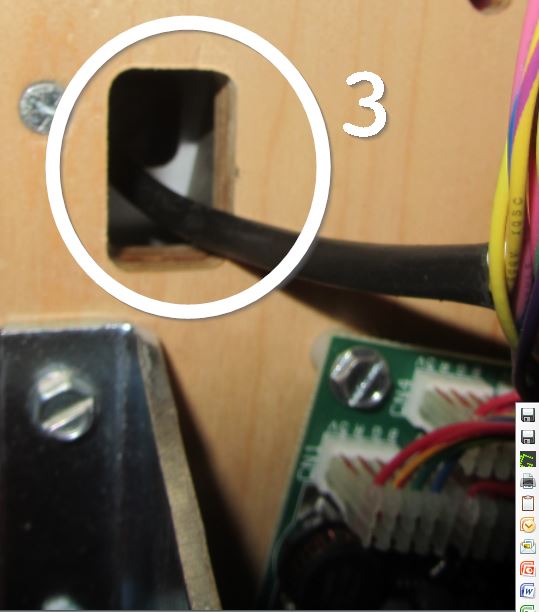
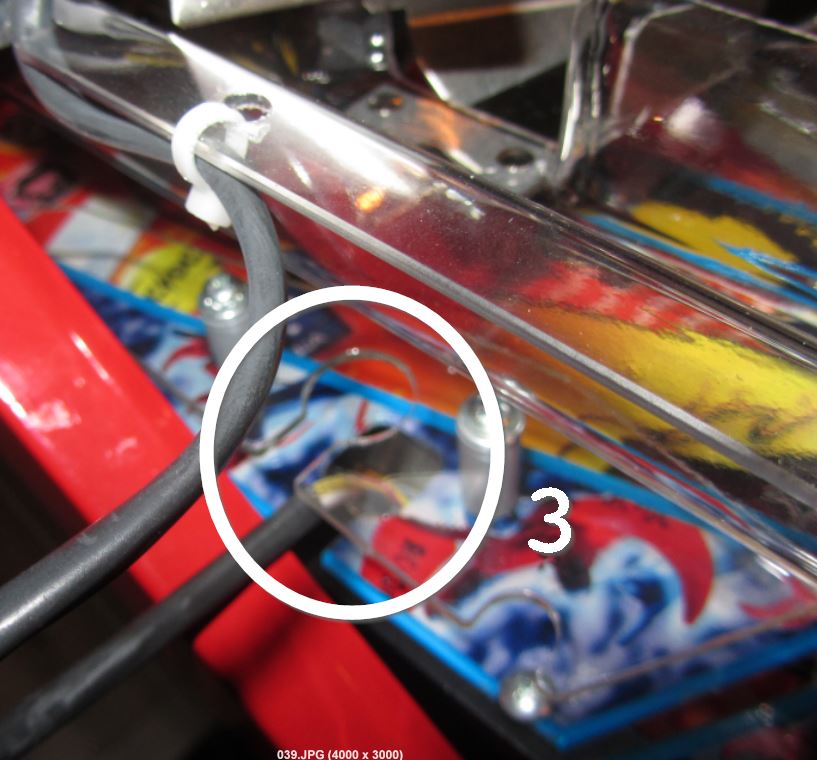
Unplug all cable connectors as shown in the pictures below. Pictures show the cables as seen from above and under the playfield where the connectors are 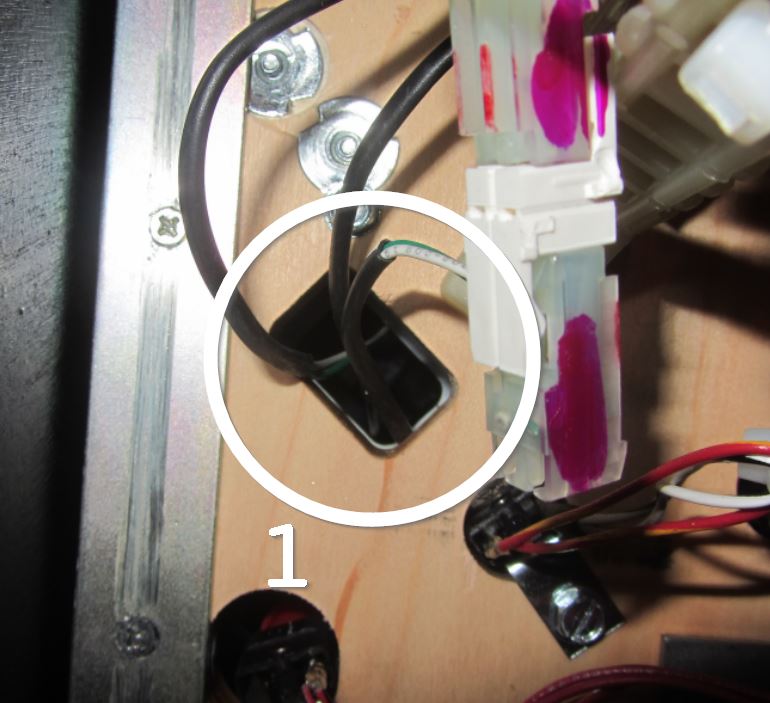
  < <
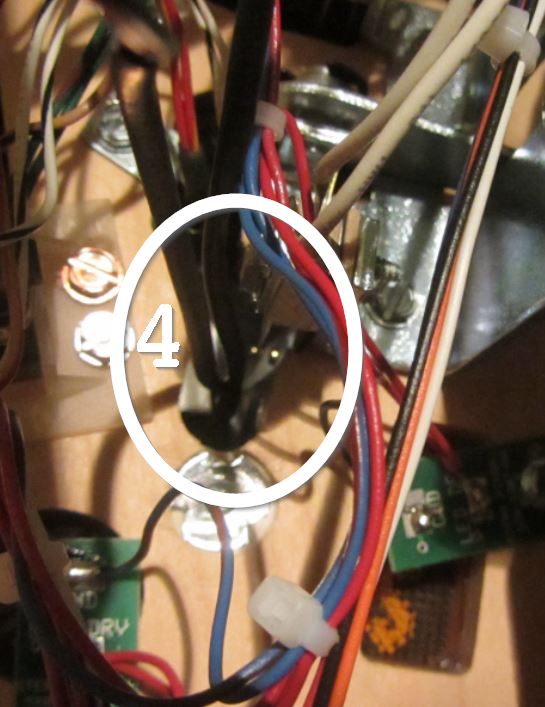 
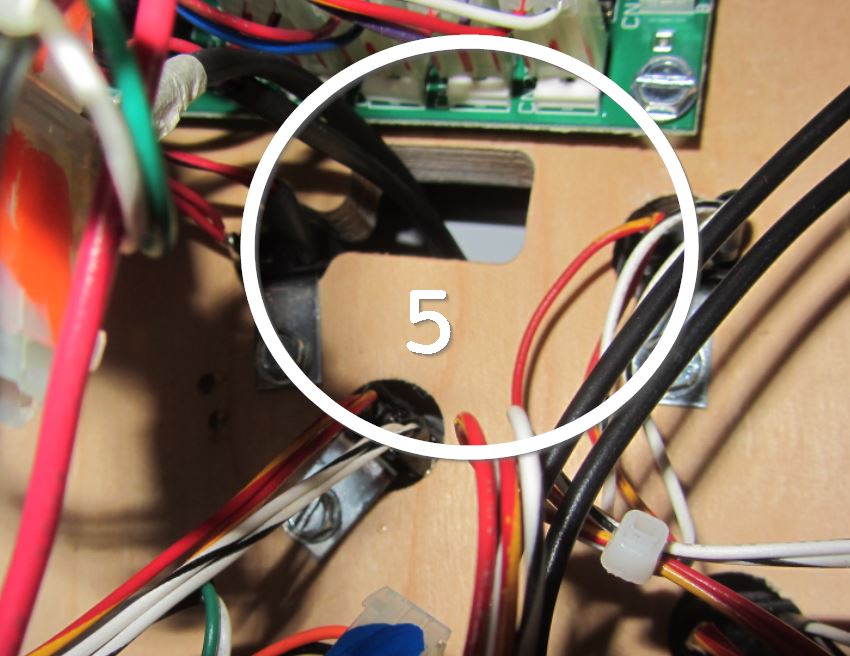 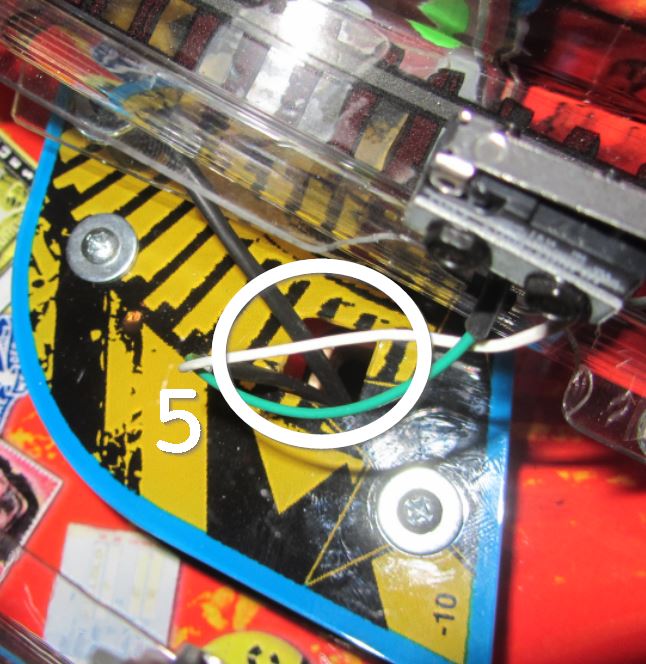 |
Loosen the nuts holding the right Hells Bell ball guide. You don't have to remove it,
just loosen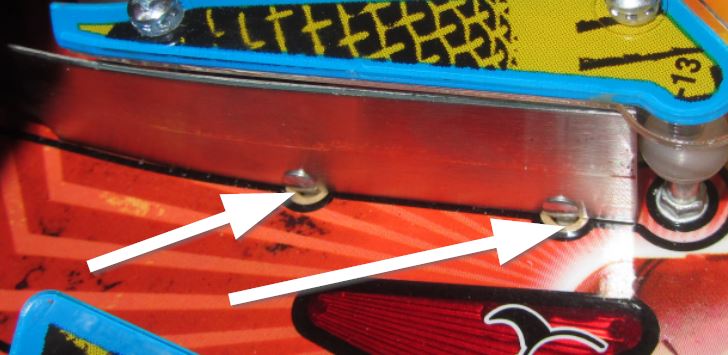
 |
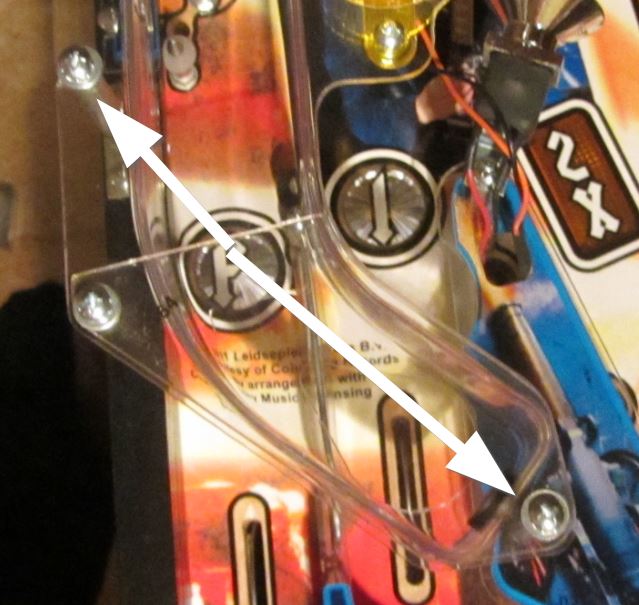
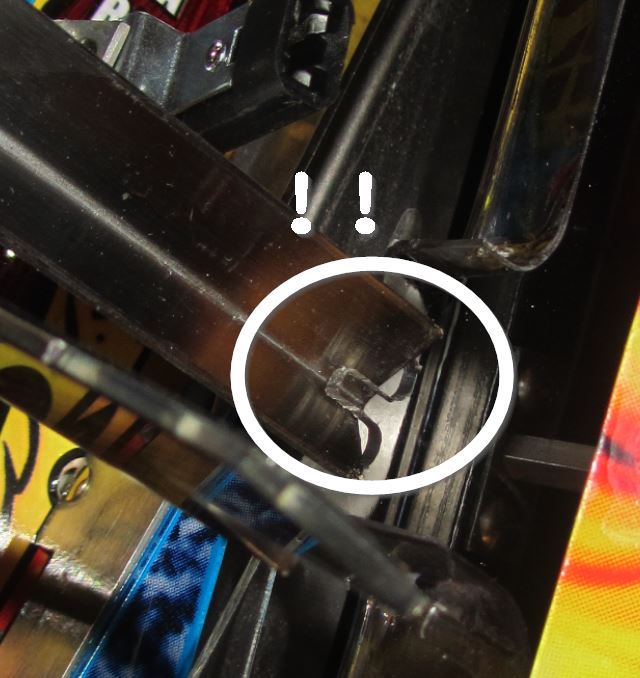
Unscrew the left ramp as shown. Be careful with the plastic tang on the right side. You cannot remove the ramp right now so just lay it aside until the next step is done 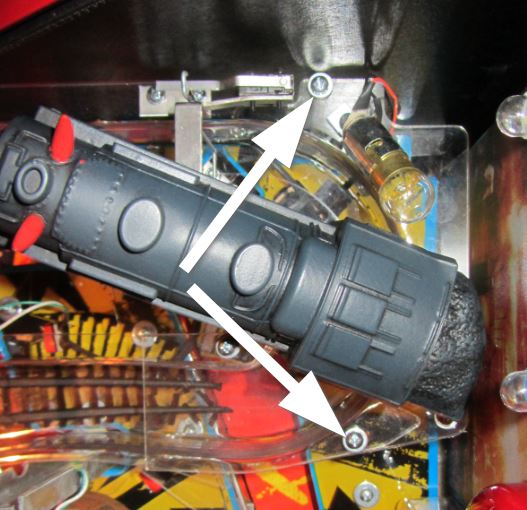
 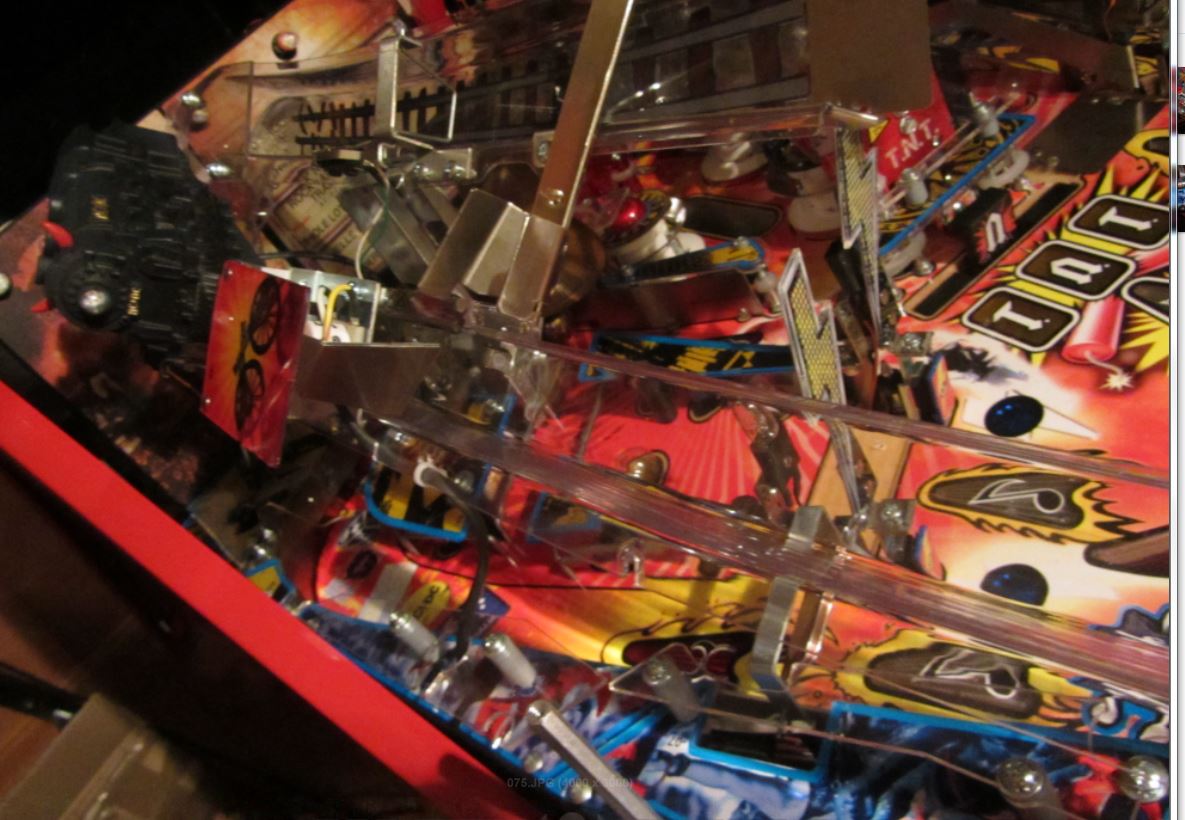 |
Before you can remove the left ramp
you have to remove the left plastic as shown here. Otherwise the cable plug will stuck under the plastic. Remember this as you reassemble everything.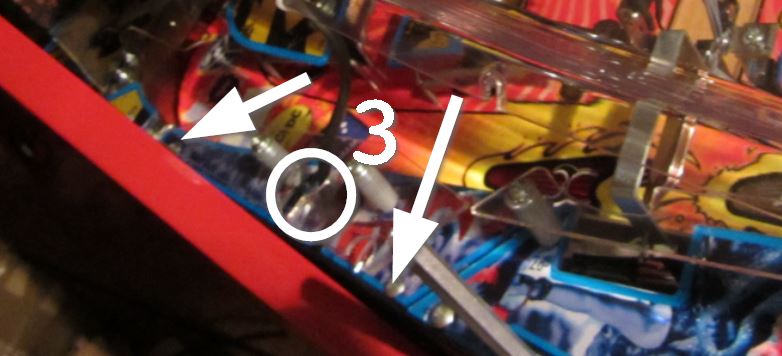 |
| Now remove the plastic parts. Look at how the 2 plastics overlap. It's important to remember this order when you reassemble. 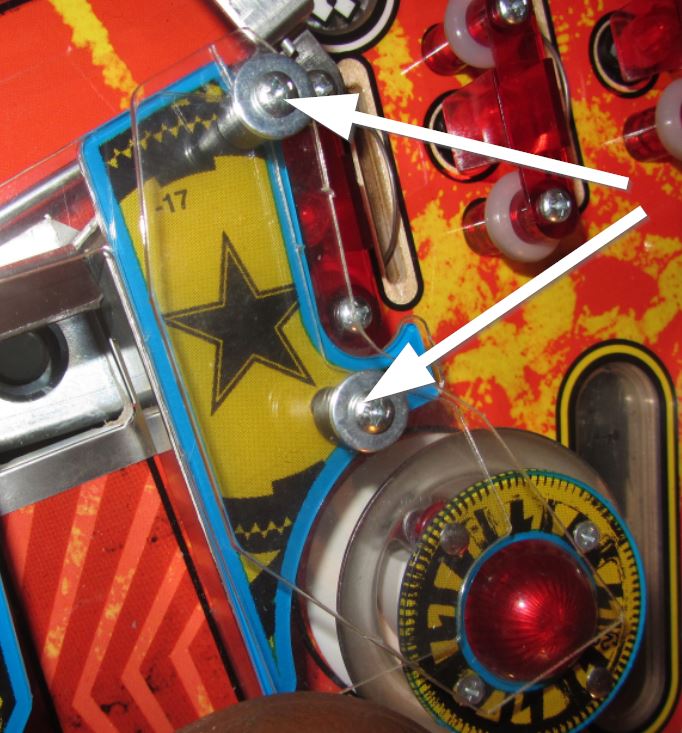
  |
Finally
remove the ball guides shown.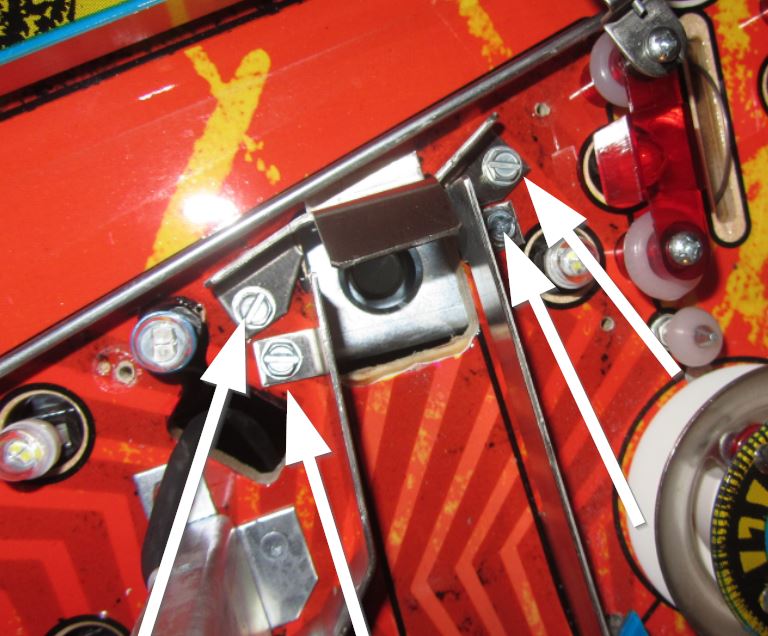 |
The left ball guide has only one screw, the other end is a small metal tang, which is seated in the wood. Do not bend the metal or the tang could be damaged 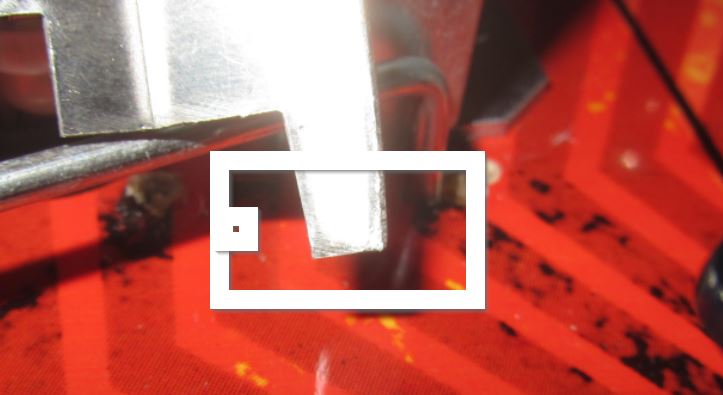
 |
Last step
install it!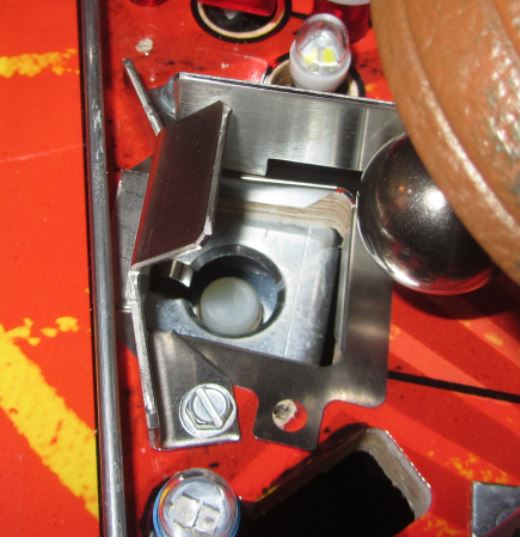 |
|
The Jukebox Protector |
Take off the one-way ball gate that is attached to the back left plastic |
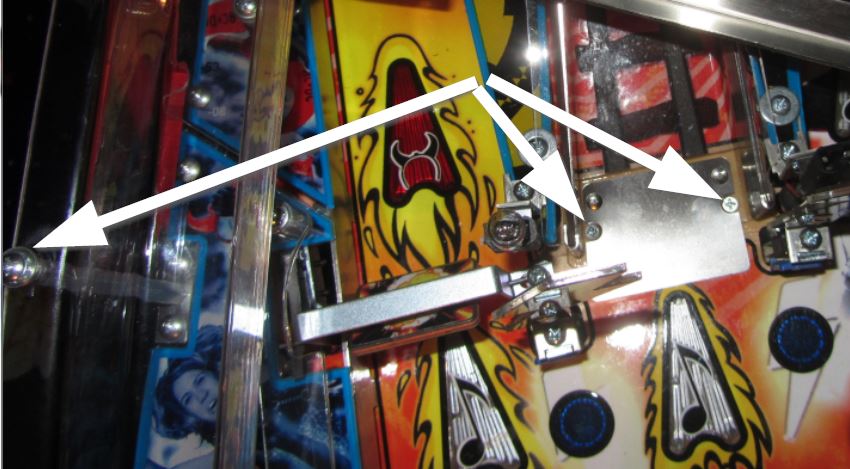
Remove the 4 screws on the back of the playfield. This will allow you to move the jukebox clear plastic cover out of the way enough to lift this piece of plastic up. You have to do step 4) as well here before you fiddle with the plastic. Be careful with the plastic!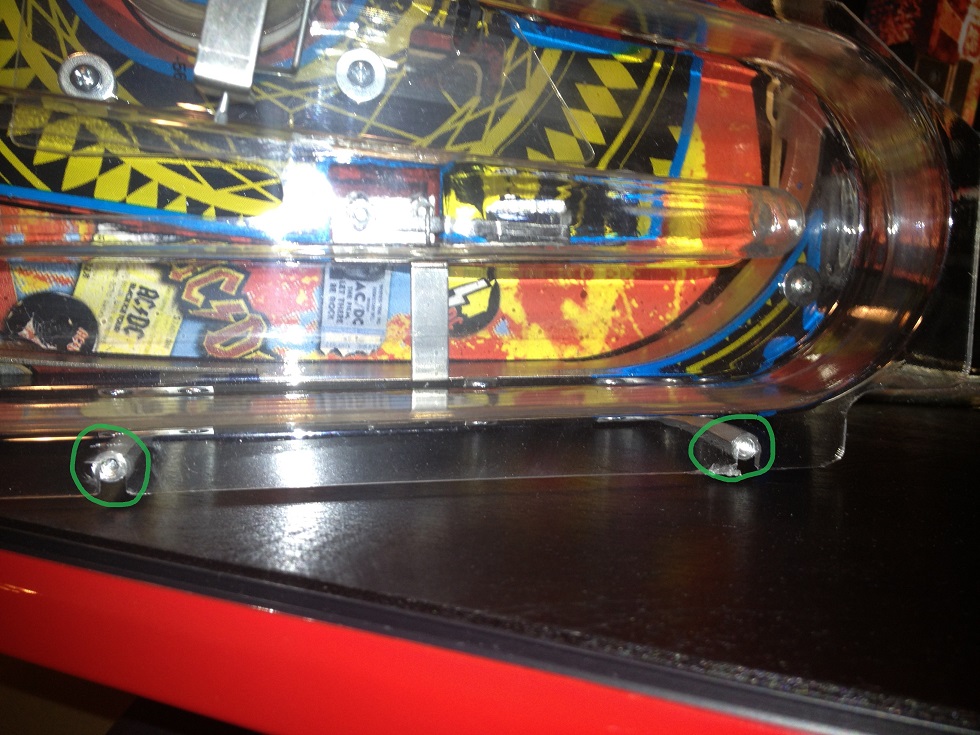 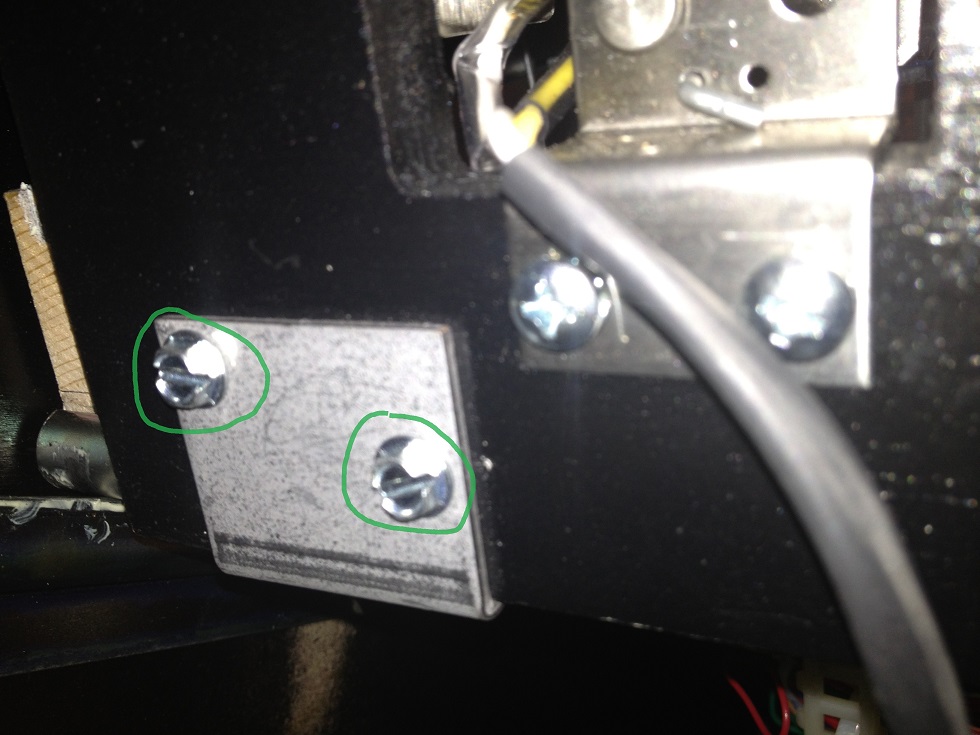 |
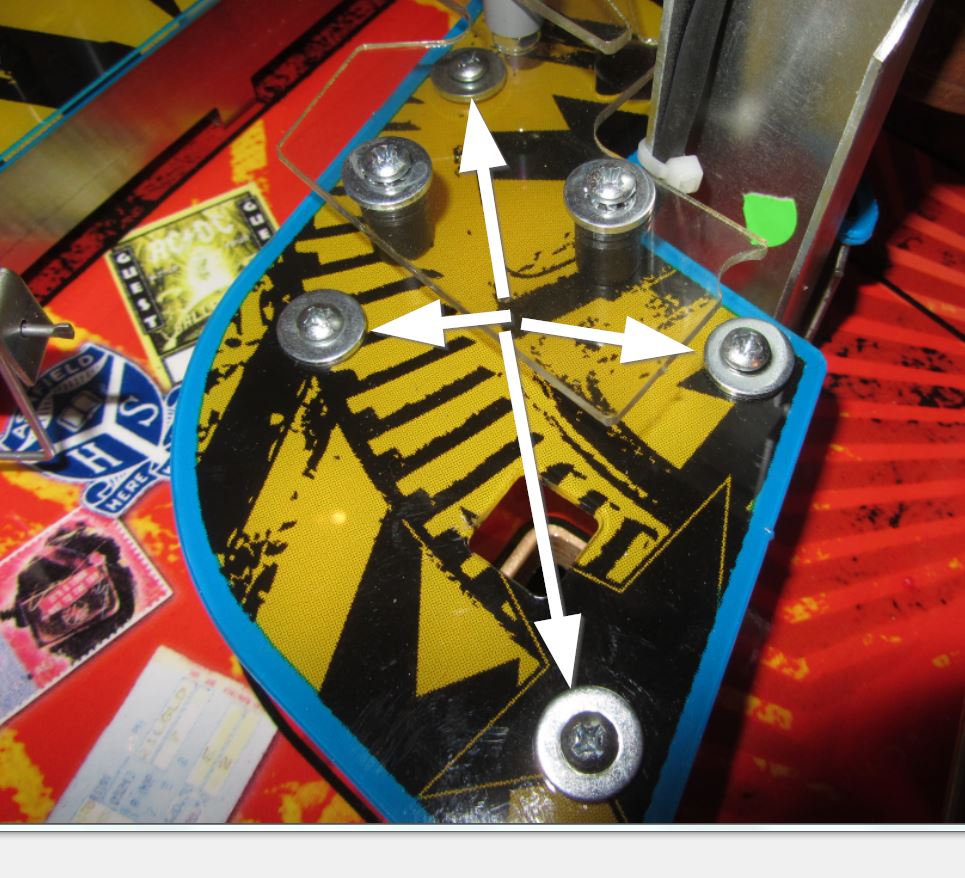
Loosen the screw that attaches the band members to the right ramp. This allows you to slide the back part of the playfield up and out of the way enough to raise that back left plastic. | Remove the 3 screws under the plastic that hold the deflector and ball guide down.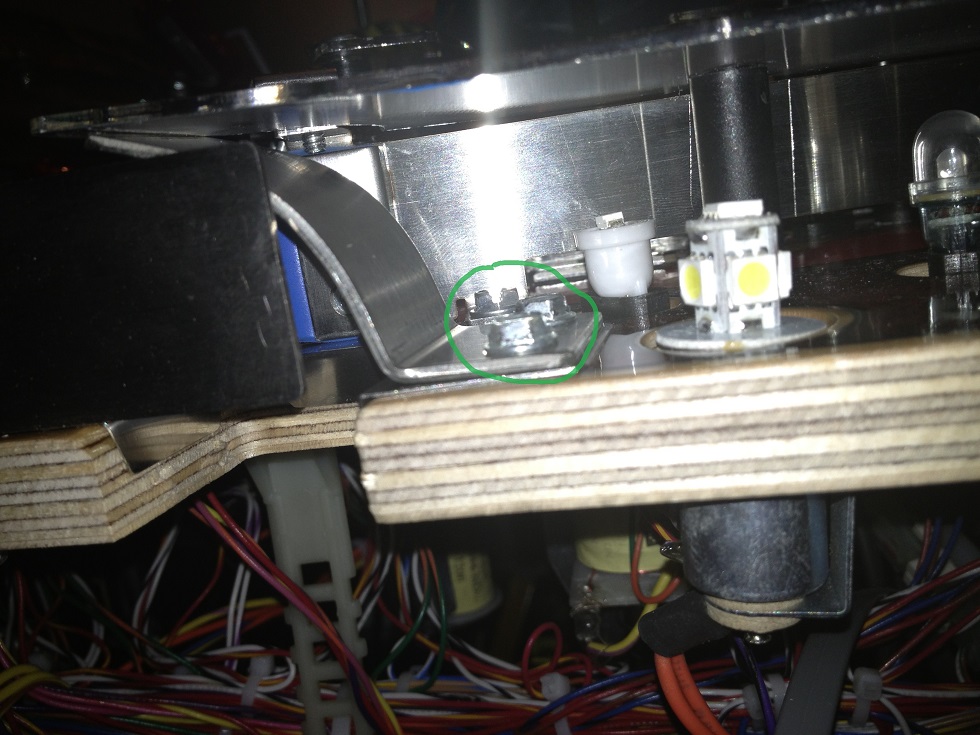 |
| Peel the adhesive tape backing off of the bottom of the protector and the clear film on top. | Slide the cliffy in place and install deflector and ball guide screws. Rub down the protector on top with a soft clean cloth to activate the pressure sensitive adhesive.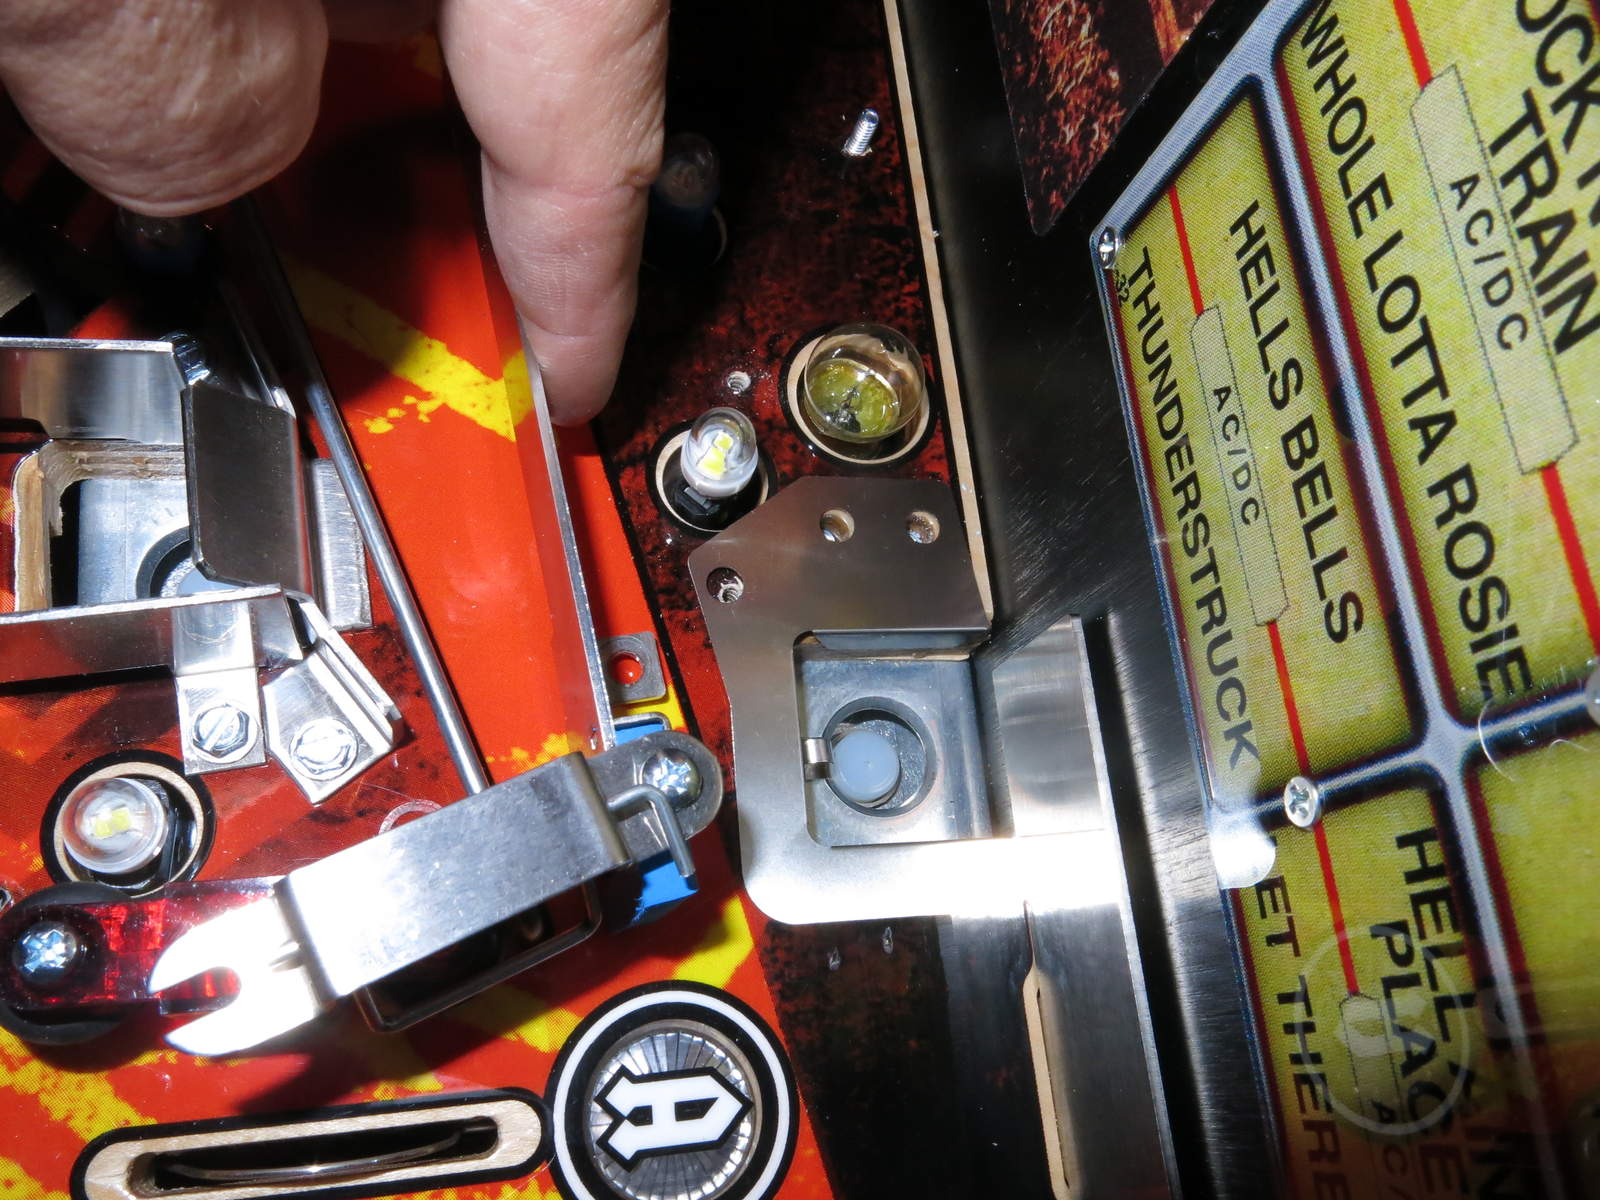 |
Reassemble in reverse order taking care not to overtighten the screws and post nuts.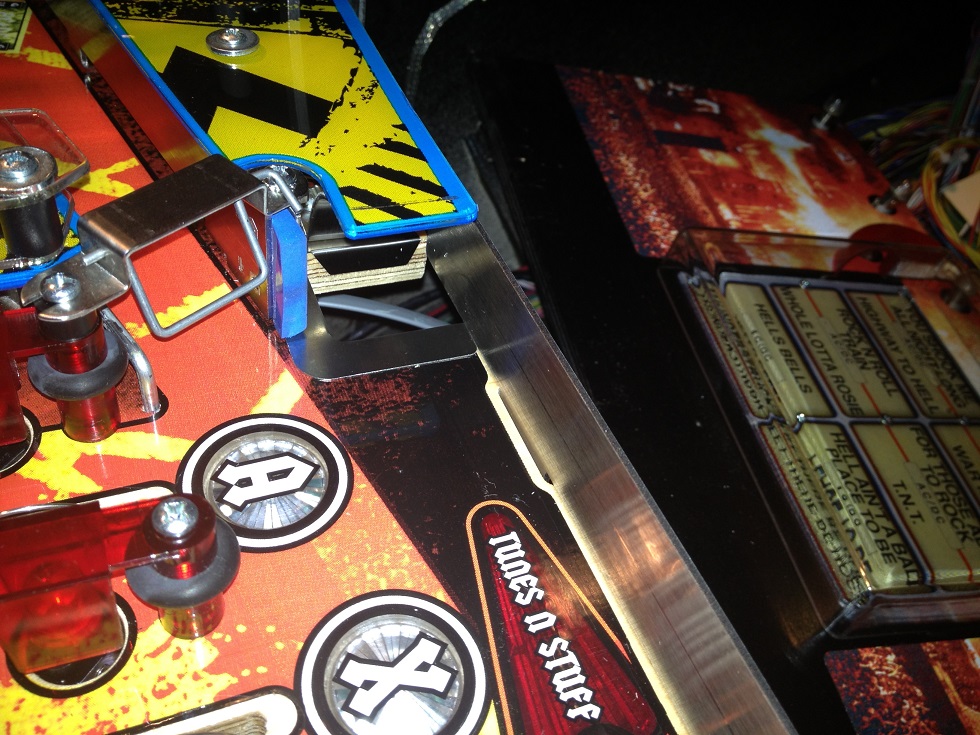 |
Done! Enjoy a well armored game for years to come | |
The Jukebox Protector |
Take off the one-way ball gate that is attached to the back left plastic |
Remove the 4 screws on the back of the playfield. This will allow you to move the jukebox clear plastic cover out of the way enough to lift this piece of plastic up. You have to do step 4) as well here before you fiddle with the plastic. Be careful with the plastic! |
Loosen the screw that attaches the band members to the right ramp. This allows you to slide the back part of the playfield up and out of the way enough to raise that back left plastic. | Remove the 3 screws under the plastic that hold the deflector and ball guide down. |